In order to stay competitive in today’s fast-paced business landscape, you need access to real-time data. More importantly, you need to be able to generate customized reports and documents to make well-informed business decisions. This is where Microsoft Dynamics 365 Finance and Operations (D365 F&O) can help.
In this article, we’ll focus on its “Export to Word” feature and how you can upgrade your reporting and documentation processes by leveraging your data and streamlining operations within D365 F&O.
We’ve got a lot of ground to cover, so let’s get started.
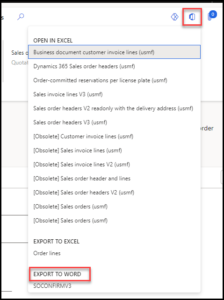
First open in Excel. Click on the ‘Export to Word’ option. This allows you to effortlessly create ad-hoc reports and documents with minimum code.
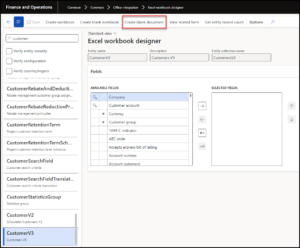
Excel workbook designer
Common > Common > Office integration > Excel workbook designer
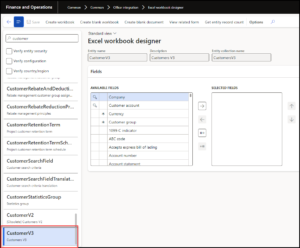
Even though it may seem like we will be working in Excel, we’ll actually be working in Microsoft Word. In fact, our journey begins in the Excel workbook design form. It allows users to become familiar with entities they will work with and the available fields within these entities.
Notice that the list of entities is displayed on the left. Once you select an entity, the fields within this option will appear on the right.
Step 1: Identify the Entity
Search for the entity you want to work within the list. However, if you have one picked out, go ahead and skip down to step 5.
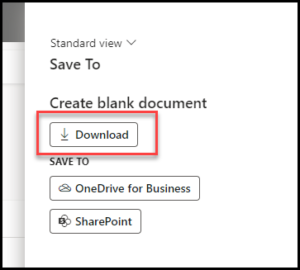
Step 2: Create a Blank Document & Download
Select the option ‘Create blank document’. At the moment, the entity you selected from the table will not be carried through to your blank document.
Now select the ‘Download’ option.
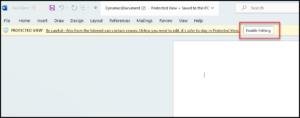
Step 3: Enable Editing
Next, select the ‘Enable editing’ option at the top right corner of the Word document you just opened. You can either rename and save the file at this time or later on after you finish working on it.
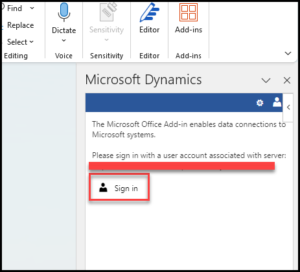
Step 4: Sign into Dynamics 365
Now it’s time to sign into your Dynamics 365 account.
Step 5: Design the Template
This is where all the fun starts. Let’s begin by discussing how you can design the template, describing aspects such as tables, labels, values, basic Word formatting, etc.
The report’s main entity will determine the format it can be accessed in while using the ‘Export to Word’ feature.
We will be utilizing the Sales order headers V3 entity. This entity will be accessible from both forms, ‘All sales order’ and the ‘Sales order details’ form.
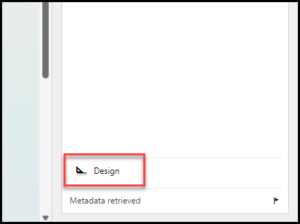
Once you click on the ‘Design’ button, you will be presented with three options, Add table, Add fields, and Labels. When you hover over each option, a little box offering associated help appears.
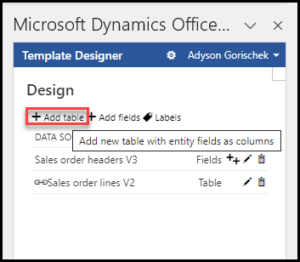
The ‘Add table’ function enables users to add a table. The entity fields you select will become the columns of your table/grid. For instance, the Sales order lines are an example of your fields.
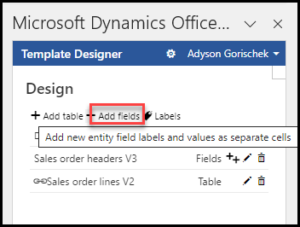
The ‘Add fields’ function enables users to add fields for a selected entity. This option offers greater flexibility for formatting to users as they can add fields separately and not while formatting the table.
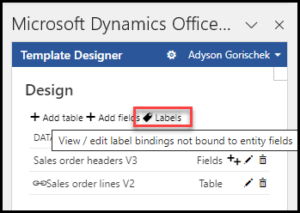
The ‘Labels’ function enables users to add labels to any fields that exist without labels. However, we will discuss this in more detail later on.
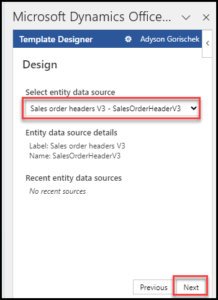
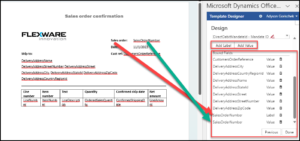
The above screenshot shows how you can Add fields. Click the ‘Next’ button and proceed forward, which we will discuss in the next section.
Step 6: Add Tables, Fields, Labels, and Document Formatting
In the ‘Available fields’ section, pick the field you want to add to the template. Then click on the ‘Add Value’ button to add values to these fields.
In the screenshot below, I have formatted my document with a logo, and header text. Additionally, I can create a custom Word template according to my needs. For instance, I selected the value of the field as the Sales order number, while creating other labels, such as Ship to, Sales order, Date, and Customer reference. Remember, the fields you select will be incorporated into your Word document. Moreover, they can be reformatted easily if the need arises.
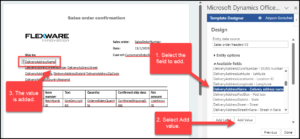
In the ‘Add fields’ menu, you will notice the ‘Add Label’ and ‘Add Value’ buttons at the bottom of the screen. You can either enter the Labels in this menu, as seen in the screenshot below, or you can type them manually into your Word document. The ‘Bound fields’ section enables users to understand whether anything entered on the document is a ‘Value’ or a ‘Label’.
Step 7: Manage Current Sources of Data
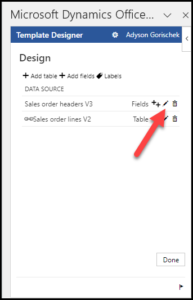
Besides the delete button, there are several other buttons on the main Design menu you should be familiar with. For instance, clicking on the pencil icon allows users to edit these fields.
Step 8: Add Related Tables
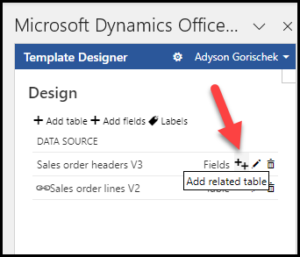
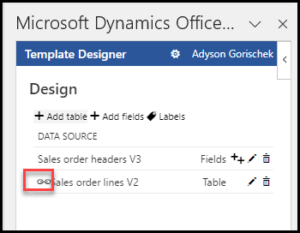
Similarly, clicking on the plus icon allows users to add another relevant table. For instance, in the example above, I was able to get to the Sales order lines from Sales order. This is a very helpful function. If I wasn’t able to add the Sales order lines as a related table, the entire sales order lines would have been pulled into this report.
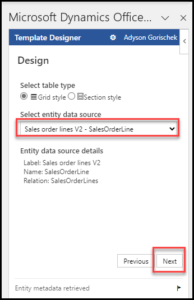
Once the Sales order lines V2 entity becomes a related table, you can add or readjust the fields by pressing the Up and Down buttons.
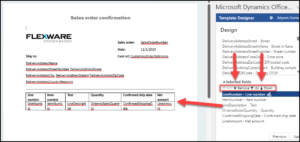
The chain-link icon is displayed next to the table that has been added as a related table, as highlighted in the screenshot below.
Step 9: Save the Template
At this stage, it’s crucial to save your template. Remember to save it under a name that is meaningful and relevant so it’s easy to find later on.
Step 10: Upload the template
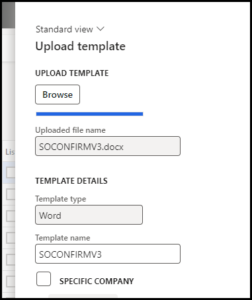
Create a new record in the Document templates.
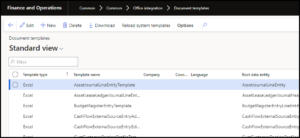
Enter the name of the file that you saved your template and upload it.
Step 11: Generate the report!
It’s time to bring everything together. Bring up the form you created and click on the ‘Open in Office’ icon at the top right corner of the screen. You should find the template you created in the ‘Export to Word’ section in order to download your report.
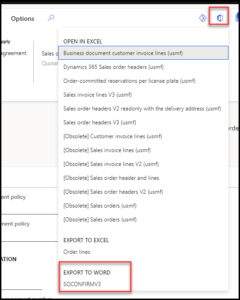
Now, all you need to do is click on the ‘Download’ button.
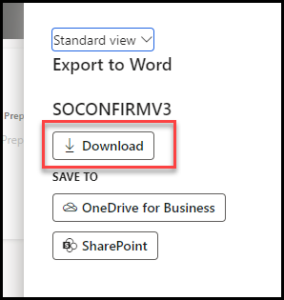
Here’s a screenshot of the report you just created – without a single word of code!
As you’ve learned by now, the Export to Word feature within Microsoft Dynamics 365 Finance and Operations enables businesses to improve their reporting and documentation processes. With user-configurable reporting and document creation options, you can create tailor-made reports that help display the right data in the right format at the right time. D365 F&O empowers decision-makers to stay competitive, efficient, and agile by harnessing the power of their real-time data.

